Sunday, August 31, 2014

A Diamond in the Rough - Tetraodon Biocellatus (F8) Rescue

About a week ago, a member on one of the forums I am regular on informed me of a friend who was moving and couldn't take their fish with them.  I got their contact information and began talking to them about this fish and was told it was a figure eight puffer - Tetraodon Biocellatus.  In gathering more information, I came to find out she was in a one gallon bowl getting monthly 100% water changes.  She was not being fed properly and I was honestly surprised she was even alive.  I told them I would take her if they were willing to ship, which they were.  I paid the absurd adoption/shipping fee that was involved with her and waited.  I begged for overnight shipping and paid more than enough to cover overnight but they were not willing to do so.  She was send via 2-day shipping, which isn't too horrible but we are dealing with a delicate, sick fish.  To my horror, she took three days to get here.

In finally receiving my package, I rushed upstairs to get her out of the box.  I gently carved into it, pulled handful after handful of toilet paper out and came across a bag with a silhouette of a puffer in it.  I didn't see her moving and my heart sank.  Once I pulled the bag out and examined further, I was happy to see that she was, in fact, alive and in much better condition than I was expecting.  I placed the bag in her new home to start acclimating her to the temperature and she took a quick look around, then began ramming the bag trying to get out.  When she realized that wasn't working, she started trying to jump out of the (still tied) bag.  I had to transfer her to a critter keeper to acclimate her so she didn't get out of the bag prematurely or hurt herself trying.

I took a sample of her bag water and ran it through my API Freshwater Master Liquid Test Kit to find she wasn't even provided fresh, clean water for the journey.  The results read as the following -
Ammonia - 8ppm
Nitrites - 0ppm
Nitrates - 40ppm
Upon seeing these results, I was so much more grateful she was still alive.  She swam around the critter keeper and I offered her a betta pellet which she mouthed (after circling adorably) and returned to the bare bottom.  I sucked it out with a pipette and let her be for the rest of acclimation.  Once acclimated, I caught her in a clean, fish-only coffee mug, draining as much water out as I could without exposing her to the air and transferred that to the tank, letting it slowly fill with tank water, only to have her decide the current was fun and ditch the cup salmon-style.  I was pleased with this as it meant I wouldn't have to put the dirty bag water in the tank with her.

She immediately begain exploring her new home and the next morning ran off with a pre-killed snail I dropped in.  I have still yet to find its shell!  She came to the front of the tank a couple times but was still rather skittish.  On day two, she stuffed her face full of frozen/thawed blood worms and passed a wonderfully normal stool.  She came out much more and just yesterday ate another snail.  She's still not sure about people being around the tank but loves it when my infant daughter is in her high chair looking at her.  When my daughter is ready to go play and is moved, Kai always goes to the side of the tank baby A sits on and glass surfs for a good hour or so.  I'm going to offer an earthworm today and see how she does with that.

All in all, it was money well spent to save this little girl from another home that would likely doom her to a small, inadequate tank.  She is still currently in freshwater but we will be starting the transition to brackish shortly.  She is so sweet and I am so excited to get my biotope really underway and add some more personable fish to my collection.

Here is my gorgeous Kai, sleeping after her first day home.  Enjoy!
dpmom


Friday, August 29, 2014

Cricket has arrived!

Cricket was sent via 2-day priority and I anxiously refreshed my tracking information.  The box was marked "hold for pick-up" but we all know how competent postal workers are so when I refreshed the page yesterday morning and saw he was marked "out for delivery" I assumed he would be here with the post.  Well, you know what they say about assuming.  Post came and while my new puffer was sitting at the door waiting for me, Cricket was not.  Naturally, I assumed (there I go assuming again...) that his box had been skipped over and the mailman would be back with him.  I waited and waited but at about 11:30, I went back upstairs to refresh the tracking page.  Apparently he was scanned "ready for pick-up" at 8:19am and it just wasn't on the tracking page until half an hour before the post office closed.  Lovely, huh?

This morning I begged my husband to let me drive him to work so I could go pick up my baby before he was returned to the sender.  He was reluctant but I finally won and drove him to work, only to come home and wait out the slowest hour and a half I think I have ever experienced.  Finally, that magic time (8:30) came and I was out the door, daughter in hand, to go pick up Cricket!  My plan was fool-proof - or so I thought.  I got there and waited for the lights to come on and the doors to open, gave my name and address as well as stated the fact that I was picking up a package.  The guy must have thought I was a nut just rambling on personal details.  He weighed and scanned it, then asked for my ID.  As I pulled it from my wallet, my heart dropped - I still haven't gotten my ID with my married name.  I reluctantly handed him an out-of-state drivers license with the wrong name and address and of course, he said something about it.  Thankfully, my insurance card was enough and I was off with my pink and purple box!

Upon arriving home, I quickly unstrapped my daughter from her car seat and put her in her swing to play.  I grabbed a pair of scissors and tore into the box, making sure I made a short video of doing so for the previous owner as it was her first time shipping and I wanted her to see the other end.  He was sent in a biological specimen box, complete with 1/2" styrofoam.  He was alive and well and when she said she was going to include some IAL, I didn't think I would get an entire leaf!  I broke off a piece and grabbed a Tupperware, off to acclimate my new little friend.

When he was done acclimating and placed in the tank, he kind-of freaked out a bit, but is off exploring now, even though he's breathing rather heavily.  I did a 50% water change, sucking out all the frog waste before I added him and double-dosed some prime.  I also added a hefty bit of moss to his log in hopes the window near the tank will be enough lighting for it.  He has some minor tail damage (he's a nervous fellow) but clean water and IAL will work wonders for that.

Lastly, an obligatory photo of my new little man, Cricket -

Wednesday, August 20, 2014

Sterilization and You

We have all had a point in our fish keeping careers that we have had a disease outbreak or something else happen and needed to sterilize our tank and equipment.  Dropsy is a very common reason you may need to break down a tank and really deep-clean and sterilize it.  If you read a lot of conflicting information like I did when trying to figure out how to do this, I think this will help you as I can vouch for it actually working and not killing future inhabitants.

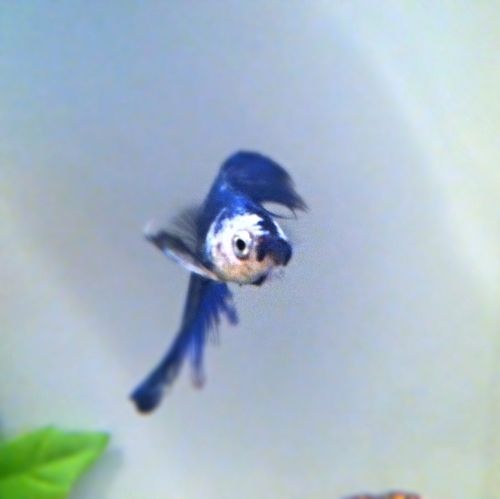
Doing what I did and sterilizing this tank so thoroughly was not necessary but it made me feel better in a time of grief and loss.  I discovered my almost three year old betta, Pongo, dead in his tank Sunday afternoon presumably of old age.  It was especially hard on me because of the "conversation" and lunch we had shared that same day.  I was getting ready for lunch and decided to go have a picnic with him as I ate and I fed him some pellets and bloodworms as well.  I can only assume he was telling me it was time and drew me to make those last moments special.  He danced around as he and I ate with every bit of youth in his eye as he  had when I brought him home almost three years ago.

The materials you will need -
A clean, unused toothbrush (I prefer the cheap ones with super hard bristles you can get at the dentist)
A clean, unused kitchen sponge (I used a good old Ocello brand sponge)
Regular Concentrated Clorox Bleach
Water (tap is good)
Measuring cup
Seachem Prime
Contaminated fish tank/ornaments/equipment

Step One: Algae and Scum Removal 
I drained the tank into the sink and carried it outside where I removed the sand (scoop out as much as possible and to get the remainder out, fill a container larger than your tank with water and slosh the tank in and out of the water to get the last little bit) and the ornaments.  I threw my sand out because I have some extra that I can use and would rather not go through the hassle of sanitizing it.  I tackled the tank first because it would be harder to wet again to scrub well.  First, I took my sponge and rubbed off as much algae as I could from the inside of the tank, using the toothbrush if needed.  I then scrubbed the outside of the tank with the sponge and used the toothbrush around the rim to make sure I got everything.  I took paper towels and dried the tank off thoroughly because we have hard water and I didn't want to leave marks all over my freshly-scrubbed tank.  (Though I later realized this was a moot point because I got the outside of the tank wet plenty of times after that.)  I then moved on to scubbing the decor (in this case a rock formation with silk plants and a ceramic log) with the toothbrush.  Just give it a good brushing and everything should come off!  I didn't get all of the diatoms (brown algae) off of the silk plants but I did get a lot of it.

Step Two: How Much Bleach?
I know I am not the only one that was afraid to dump bleach in my tank and all over my ornaments.  After a lot of research, I decided on the 1:19 bleach to water ratio.  The first thought that entered my mind was "How on earth am I going to do that?  It probably comes out to 5/9ths of a cup or something crazy."  I went over to trusty Google and asked him (yes, I think Google is a boy) how many cups were in a gallon so I could calculate the volume of my tank this way.  He returned an answer of 16 cups per gallon of water so I did the following equation -
16 (cups) x 2.5 (gallons) = 40 (cups of water in your tank)
Now that I knew there were 40 cups of water in my tank, I had to calculate how much bleach to add to the water to achieve our 1:19 ratio.  I think this size of tank was perfect for an example because it came out to 40 and we all (should) know that 20+20=40.  That means there are two cups of bleach for every 2.5 gallons of water because the ratio is 1:19 and 1+19=20.  To calculate exactly how many cups of bleach you need in your tank, do the following equation or refer to the list below -
tank volume in gallons/2.5x2

Some common tank sizes and the amount of bleach you'll need -
10 gallons - 8 cups
20 gallons - 16 cups
40 gallons - 32 cups
55 gallons - 44 cups
75 gallons - 60 cups

Step Three - Bleaching the Tank
To actually bleach the tank, I brought the tank to the sink and filled it to the rim, then sat it back out on the porch where I removed two cups of water (the amount of bleach I was going to add) and added in two cups of bleach that I poured evenly around the tank.  I made sure my hollow ornaments had no air trapped in them before I did this and left them on their side while I bleached.  I let the solution sit for seven minutes then took an old siphon and drained the tank off the size of the porch.  Once empty, the tank was brought inside again, where I turned the faucet as hot as I could get it (which is scalding) and let it fill the tank then overflow for a minute or so.  I drained, then repeated this step five times.  Next, I dosed Seachem Prime at 10 drops per gallon and filled it with scalding water, drained and repeated two more times.  At this point, I took the tank outside and let it sun-dry along with the ornaments.  Once it dried, I thought it still smelled like bleach so I filled it with Primed water a fourth time and let it sit full for six hours.  I then drained and dried the tank.  I thought I still smelled bleach but my husband said I was imagining it so be sure to have an extra nose handy for another opinion.  I was worried about residual bleach so naturally, I smelled bleach.

At this point, I dried the tank off and started painting my background on.  I am snail-testing my tank before I add my intended stock just to be sure but I just added them today and they are holding up fine.  I am not getting any readings with my API Master Liquid Test Kit, either.  I hope this will help someone and I'll update you all as the tank gets closer and closer to completion.

As always,
dpmom